Webhooks configuration
Webhooks allow you to send data to your Home Assistant instance via Home Assistant Cloud. You can use these webhooks for example to trigger automations or to send location data with integrations like OwnTracks.
Guides:
Presence detection with OwnTracks
OwnTracks is an application for iOS and Android that allows your phone to report location information securely and directly to Home Assistant. This is used for location-based automations, such as turning up the heat in your home when you leave your workplace.
To set up OwnTracks, follow the procedure described in the OwnTracks integration documentation:
- In Home Assistant, under Settings > Devices & Services, configure the OwnTracks integration.
- Take note of the Host URL and the encryption key, you will need it in the next step.
- On your device, install the OwnTracks app.
- Follow the instructions on the screen.
- For a description on the configuration options, refer to the OwnTracks integration documentation.
- Under Settings > Cloud, you now see a webhook called OwnTracks.
- You can now use this webhook in an automation.
Triggering an automation with a webhook trigger
This tutorial will show you the following:
- How to manually create a webhook.
- How to use this webhook in an automation.
- We will be able to trigger this automation from anywhere in the world and use the data in the trigger.
To create a webhook trigger and use it in an automation, follow these steps:
-
To start creating a new automation, go to Settings > Automations.
-
Under Trigger, select Webhook.
- Under Webhook ID, leave the ID as is.
- Select the cogwheel, and make sure the Only accessible from the local network is cleared (de-selected).
- This means your webhook is now accessible via cloud.
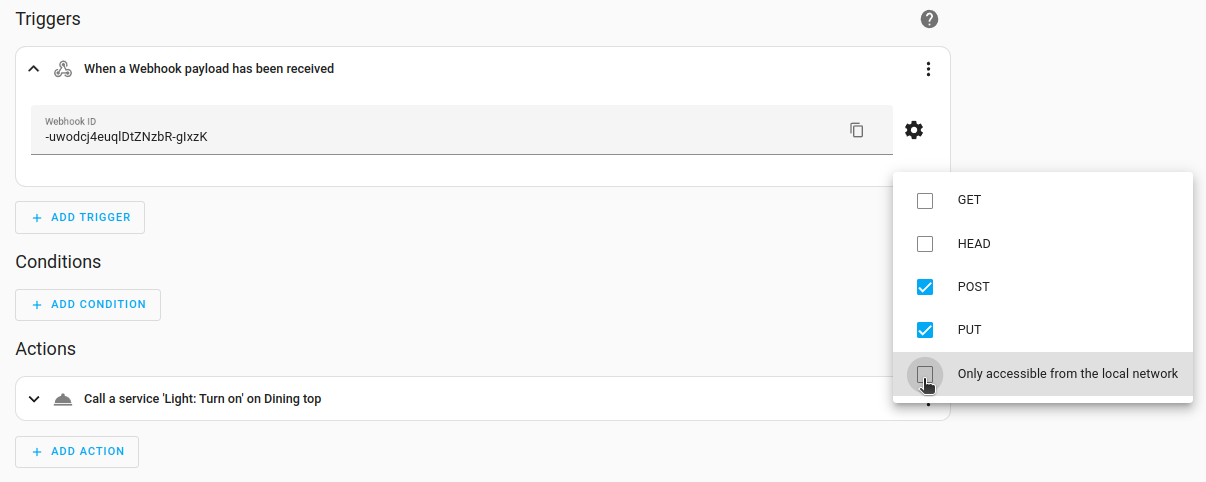
- This means your webhook is now accessible via cloud.
-
Under Action, select Call service and set the service to Light Turn On.
- In the bottom right corner, select Save.
- Your automation is now created.
-
Go to Settings > Cloud and scroll to the webhooks card.
- You will now see your newly created webhook.
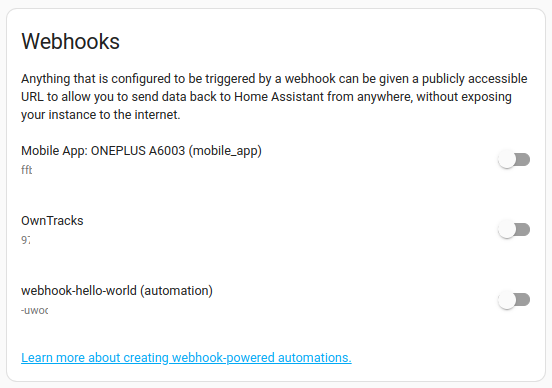
- You will now see your newly created webhook.
-
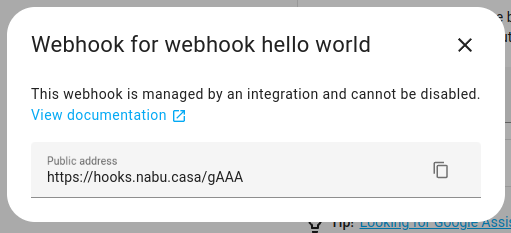
Next to the webhook, select Manage.
- A dialog opens, showing you a unique URL. You can use to this URL to trigger your automation.
- If you’re on a Linux or Mac, you can test it out with the following commands:
curl -X POST <the webhook url>- Form data or JSON data sent to the webhook endpoint will be available to templates in your automation as
trigger.dataortrigger.json.
Related information
For more information about webhook triggers, refer to the documentation.